Showing posts with label nail art. Show all posts

Sunday, 29 March 2015

Let's Talk About: Sleep


Ah sleeping, one of my favourite weekend activities. I recently found out that March is International Sleep Awareness Month from a sleep loving company called Casper Mattress that is trying to generally raise awareness. Of course it's now nearly the end of the month (oops) which seems to have flown by! 

I'd love to spend every day sleeping in till mid afternoon, but I've been so busy with University work that that hasn't been an option lately! I love this little infographic Caspar sent, and I've definitely related to them all at some point but probably the one that suits me most is The Bed Hogger (hello starfish sleeping style).

Which one are you? And just before I go I'll leave you with these sleep inspired nails - Snorlax Nail Art - the laziest of all the Pokémon.


Sunday, 10 August 2014

Houndstooth Nail Art

Something I love to do but rarely end up featuring is nail art. I always forget to take pictures of each step! Anyway, I'm going to try and make a conscious effort to show more, and this time I'm sharing something a little more advanced: houndstooth pattern. Up close, it can look a little messy, but from the distance most people see your nails; this looks pretty impressive.


The first thing to do is protect your nails with a base coat, and then get your base colour down. I've gone for monochrome here, but feel free to try different colour combinations!

The way I do this pattern, is to get the basic squares pattern sorted initially (with a nail art pen) and I find by drawing lines first this helps with the spacing. Then add lines to opposite corners of the squares, and 'bunny ears' to the top corner in between.

Finish with top coat and you're done! This design is certainly easier said than done, it's pretty fiddly and time consuming, so approach this with plenty patience and a steady hand!

Thursday, 17 July 2014

Summer Nail Art


I posted these nails on Instagram the other week and got a really positive response, so I thought I'd share them here too!

After exams and plenty of end-of-year celebrations, it had been a while since I'd attempted any real nail art so I thought I'd have a little practice of patterns, mixed in with some other summery designs like fruit and florals!

I started off by having a gradient of colours (from blue to green) across my nails, and then alternated between basic patterns and more intricate designs to keep things interesting but not over-the-top. I used a combination of nail stripers and nail pens for the various patterns, depending on how thick/neat I needed the lines to be.

Let me know if you'd like any tutorials on these!

Wednesday, 29 January 2014

NOTD: Dreamcatcher Nails

Hey! Just a quick cheeky post today, because I wanted to share my first post-exam nail art! Lately I've been loving mint green so I wanted to use that as a base colour (although photos are showing up more blue) and I've gone for cute little dreamcatchers to practice my line work.


Products used (left to right): Essie Help Me Grow, L'oreal Colour Riche in 602, Ciate Ditch the Heels, Models Own Nail Art Pends, Essie Good to Go.

Apologies for the lack of tutorial, I forgot! Having said that, I paint my nails way more often than I post on here, and I'm tempted to share more often, sans tutorial. What do you think?

xxx

Wednesday, 13 November 2013

Nail Art: Owls!

Hey! Today I've got another nail art tutorial to share with you, and I feel like this one is a bit overdue, given my own love of owls. Seriously. I have owl jewellery, owl print clothing, owl cushions, an owl doorstop, owl print mugs, owl phone case, owl twitter background... you get the idea.

And right now I have owls on my nails; want them on yours? Here's how:


1. Apply base coat, and then a dark brown all over the nails.

2. Apply a pigmented nude or light brown to the inner section of the nail (if that makes any sense at all).

3. Add large white dots for eyes, using a white nail art pen or dotting tool.

4. Use a black striper to add a criss-cross pattern to the nude/light brown area.

5. Add final details of pupils and a yellow beak (again with nail art pens or a dotting tool) and complete with top coat.

And there you have cutesy owl nails! Sorry for the bad lighting, I keep forgetting how dark it gets so much earlier now...

Any particular nail art you'd like to see next?

xxx

Wednesday, 9 October 2013

Nail Art: Glitter Aztec

Hey! Today I thought I'd share a really quick and easy nail art, that I really like to do this time of year. The design works well in pastels in brights for warmer weather, but there's something about using a glitter polish which makes it so Autumn-y.

The other thing I love about this design is that it can help to make your nails look longer (or at least I think so). So, enough chat - onto the nail art!


Step 1: Apply base coat, and paint your nails a dark autumnal colour.

Step 2: Paint a thick stripe in a glittery colour down the middle of each nail.

Step 3: Use a striper to add black lines either side of the glittery stripe.

Step 4: Add a zig-zag pattern down the middle of the glittery stripe and in between the black lines you have just painted.

Step 5: Finish with a top coat.


Super easy to do, and takes hardly any extra time compared to painting your nails normally!

Hope you enjoy this design!

xxx


PS. Just a quick update, I've got a brand new swanky blog design courtesy of Amy at srslydsgn.com (thanks again!). I actually won this in a giveaway, but Amy's prices are very reasonable and I would highly recommend her services if you're on the lookout for a fresh blog update!

With my new blog layout, I've also now got a few extra features such as my blog button - and if you'd like to do a button swap, feel free to drop me a tweet/email.

Wednesday, 11 September 2013

Suits Nail Art

Hey! Lately I've been a tad addicted to the TV program Suits and so I thought I'd share some nail art inspired by that!


The picture on the left is the one I did most recently, but I also thought I'd show some of the other suits-style designs I've done in the past. The middle one is the nails I had a New Years last year, and the tuxedos on the right are my go-to for formal events.

The design itself is actually really easy to create: simply paint you nails in whatever colour you wish, then add a triangle of a different colour at the top or the bottom of the nail with a thinner brush, and finish with details using a nail art pen or small dotting tool. You could do a normal tie or a bow tie and buttons. Simples!

In other news, I recently won a giveaway to have my blog completely (and properly) redesigned! Exciting times, so keep an eye out.

xxx

Sunday, 25 August 2013

Prairie Charms: Project Blogger

Hey! So the last post featured a lovely little online boutique called Prairie Charms. They hand make gorgeous jewellery and hair accessories and today I'm going to review some items I've ordered from them, as well as offer you the chance to win some in my first ever giveaway!

Before I jump into proper review mode, I'd like to take to a minute just sit right here I'll tell you how I became the Prince of a town called Bel Air to rave about how great the customer service is! The email responses are so fast and super friendly; I feel well and truly looked after even with one small order! I should also warn you this post is pretty picture heavy (everything is super pretty though).

One final thing (I promise) is how cute the packaging is! My order arrived in a fancy gold envelope (none of this boring brown paper here), making me feel a bit like Charlie in Charlie and the Chocolate Factory - or should it be Charley and the Chocolate Factory? Anyway, I digress... each of the products was wrapped safely in cellophane and then pretty purple tissue paper (how did they know purple's my favourite colour?) making my order feel more like a gift than a purchase.


Okay, onto the actual products!


I chose a couple of hair bows - a pink polka dot one for day, and glittery ones for night; some plain black hair ties (I'm sure I've read somewhere this style does't snag your hair) and because I spent over £10 they also sent me a little extra in the form of a glittery purple heart headband (could also be worn as a bracelet).


So first up is the pink polka dot hair bow. This is the Aaliyah Bow - £6.50*, and I think it's so cute and retro! I've worn this at the front of a hair bun (using a Vivienne Hair Tie - £5*) and it takes seconds to clip in, but really adds a bit of interest to the hairstyle. I was a bit worried initially that wearing a hair bow might take me back to my school years and make me feel a bit childish - but its quite the opposite I think! I feel some 50's housewife vibes crossed with Minnie Mouse. As homage to that, I've put together a little outfit I'd wear with this; as well as some nail art:


I've picked some light blue 'mom jeans' with a simple white cami and cutesy accessories. I've also taken inspiration from my own mum as she actually had this Ted Baker bag in a peach colour! This works for warmer weather, or the addition of a cream knitted cardi makes it suitable when there's a typical British chill!


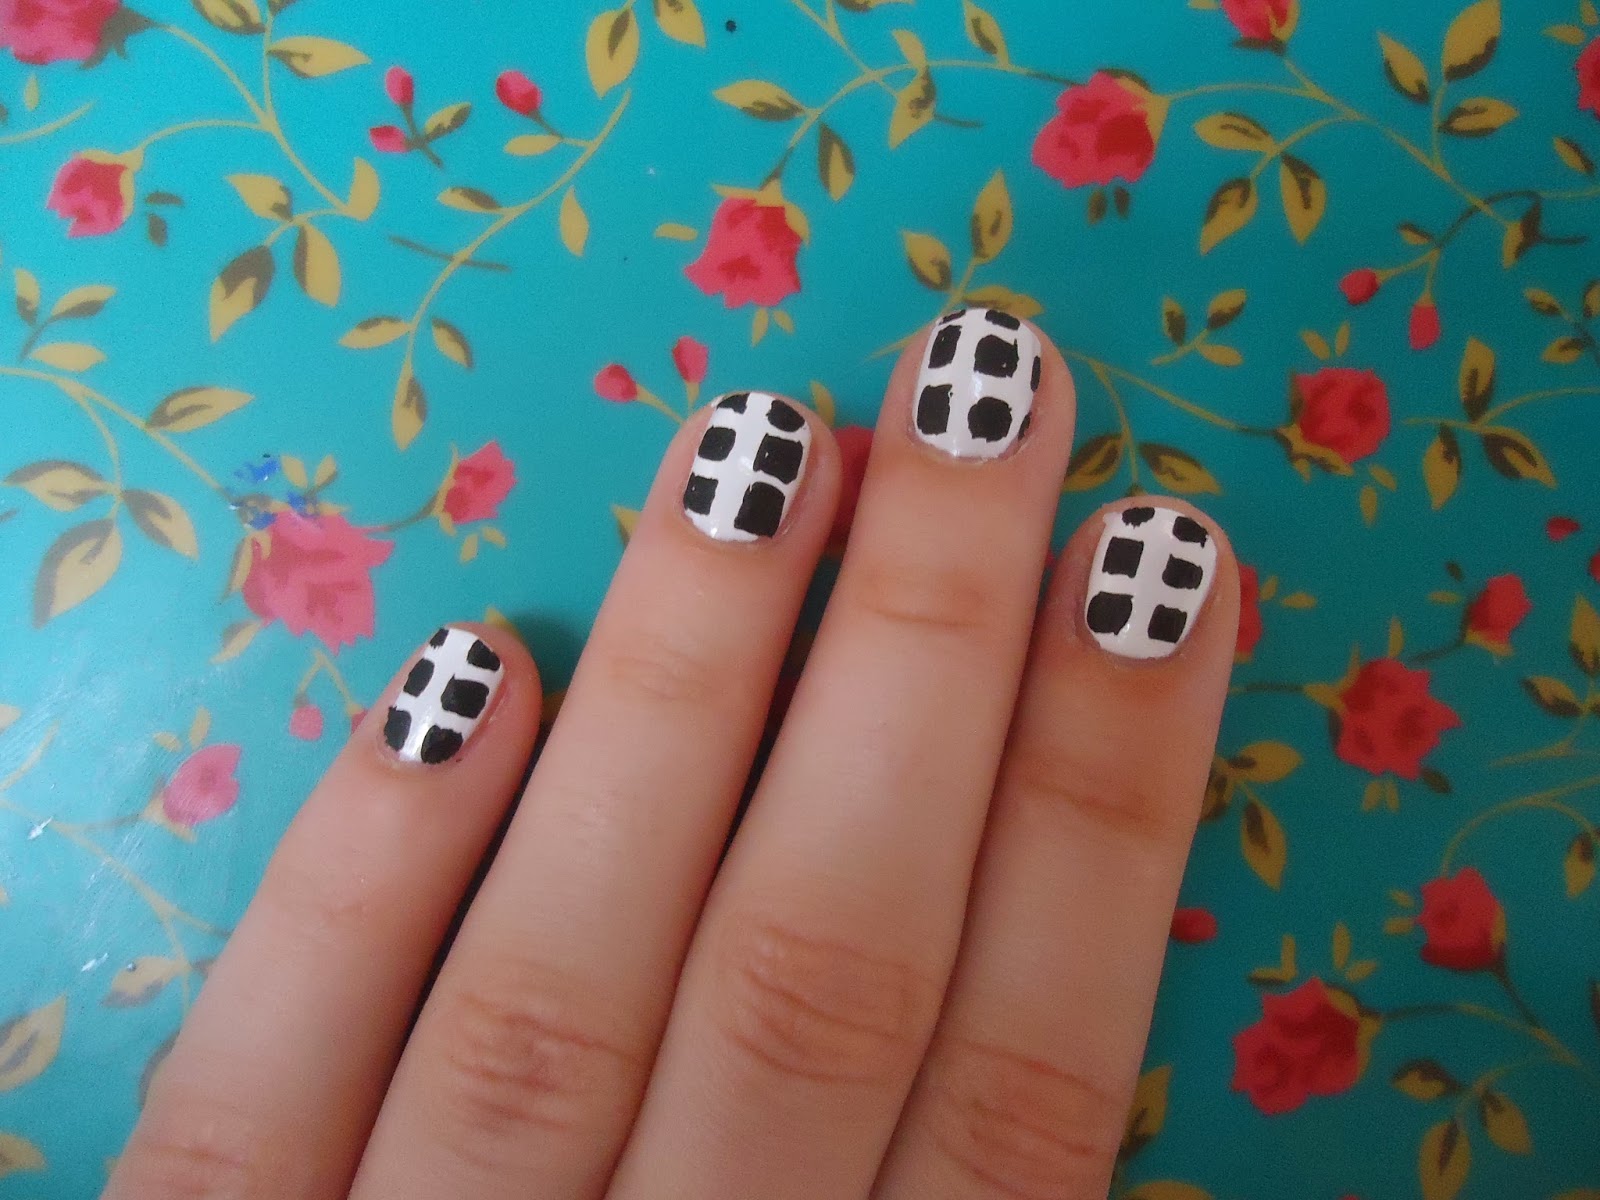
For nails, I didn't want to be too obvious and have plain polka dots so I went with something which highlighted the Minnie Mouse feel the bow has. I would have had white Minnie-heads but they didn't show up too well! So black silhouettes with a glitter accent nail it is! 


Next up is the Effie Glitter Bow in Peacock - £8*. I LOVE the colours of this! It's so unique to anything I've seen in shops, and I think it'll be great to jazz up outfits for a night out! The other bonus is that to go from day night all it would take is a swap of a hair bow! So, what would I wear on a night out with this?


...A dress of course! And some accessories which complement the hair bow; glittery shoes, a necklace with similar colours and a simple bag to bring it all together!


For nails, I've tried to find a colour in my collection which complements the hair bow and so I've gone for a bright teal colour. I could have gone for all-out glitter nails - but I didn't want to go over the top! So one glitter accent nail again, and a second accent nail in a simple-aztec design for this look.

I am super happy with my hair bows, and also my hair ties which really don't snag your hair or create that dreaded kink! I'd now like to offer you lovely people the chance to win the other items I haven't mentioned yet! That would be the other glitter bow, and the purple glitter heart headband!


This giveaway will run for a month, and then I shall let the winner know! To enter, simply use the Rafflecopter widget below and make sure you're following my blog either with GFC or Bloglovin'


*Products purchased with 50% off as part of Project Blogger.

Saturday, 27 July 2013

A Comparison of Nail Art Pens

Last year, nail art took off in a big way. Since then, many brands have jumped on the bandwagon and released their own products to help create pretty designs for your nails at home.

Of course you can but sets of nail art brushes, and dotting tools etc but what I like to use most are nail art pens. I particularly like those which include a striper and a fine nib, but that in no way means that all are the same. So today I thought I'd compare the various ones I've tried and offer my opinion on them.

First up, and the first ones I got (in black, white, silver and silver glitter), are the Orly Instant Artist colours. Not quite nail art pens, the applicator is a striper, and is easy to use for precise striping. Because the length of the striper is quite long; I find these best to use for small details and dots too. I like the formula of these best too, the consistency is not too thick and colour pay-off is good in one coat (wouldn't expect any less really, Orly are one of my favourite nail polish brands). The other thing I love about these is the range of colours available! You can buy these online for about £5 each, or there are 'starter kits' available with basic colours.


Next are Model's Own Nail Art Pens, originally a collaboration with Wah Nails (follow them on Instagram for great design inspiration!) and the recent pastel colours are a collaboration with Artstix. These have a striper and a fine nib. I would say these are the best for versatility, as you can use these to create very detailed designs. Having said that, I'm not so keen on the striper in these, sometimes the line created is too thick for my liking, or not opaque enough. These are more widely available, they can be found in most Boots stores or if you're looking online you can buy sets of 5 for £20 on the Models Own website.


Finally we have the Kelly Brook Nail Art Duo, which I picked up in New Look the other weekend for £2.99. I'd been visiting my friend and promised to paint her nails for her birthday, only to forget to pack any of my nail art pens. Oops. So I got this last minute, and while it did the job, I can't say I'd recommend it at all. The pen itself is similar to the Models Own ones, but formula of the polish itself is so thick it's hard to work with. It does come with gems to create some 3D nail art; the clear ones look quite tacky on but the blue ones are okay. If you are looking at purchasing some nail art pens, I would say skip these and pay a little extra for decent quality.

So that's all the nail art pens I've tried so far. I'm pretty intrigued by the Barry M Nail Art Pens, as they seem to have a felt tip style applicator.

What nail art pens have you tried?

xxx

Monday, 8 July 2013

My Weekend: Instagram Style

Hey! Today is something a bit different, and I totally meant to put this up yesterday but I was so tired after a busy weekend! It was my best friend's 20th so I went to visit her for celebrations. We had a delicious meal and cockails in Las Iguanas (sadly, not pictured) followed by ice cream at Creams (also not pictured, sorry!) on the Friday, and on the Saturday (her actual birthday) we went shopping and then clubbing.

I'd baked some popcorn and choc-chip cookies (recipe here) from Joy the Baker's blog (highly recommend these, so yummy!)  and promised to do nail art for her. This actually ended up turning into nail art for her housemates too, and we had a bit of a mini salon going on in the back garden!


Our outfits seemed to have a bit of an electric blue theme going on (love that colour) and I finally decided to brave the crop top trend!

What did you get up to this weekend?

xxx


PS Apple Sourz and Coke make an oddly nice drink...

Sunday, 30 June 2013

Life's A Beach!

Hey! In honour of the goorrgeous sunny weather we've been having this weekend, I thought I'd paint my nails like beaches. Apologies, I only half-remembered to take pictures of each stage but this really is easier to do than you'd think!


Step 1: Apply base coat, then a light blue colour to the 'top' third of the nail (near the cuticle). As you can see, I went a bit further than that; oops.

Step 2: Apply a brighter blue to the middle part of the nail.

Step 3: Apply a nude colour to the 'bottom' of the nail. For steps 1, 2 and 3 its fine to use the brush already in the nail polish.

Step 4: Add details such as seagulls (black striper/nail art pen) and waves in the ocean (white striper/nail art pen). I also added the tiniest amount of glitter to the ocean for a bit of depth.

Step 5: Apply a top coat to protect your design.

And that's it! Beaches on your nails, so even when the weather isn't great you can still enjoy a bit of summery-ness.

Products used: Models Own Wah Nail Art Pen (white), PDR Base Coat, PDR Top Coat, PDR Glitter Top Coat, Orly Instant Artist (black), OPI Can't Find My Czechbook, Ciate Cookies and Cream, Barry M Blue Moon

What are you all up to this sunny weekend?

xxx

Friday, 14 June 2013

3 Step Nail Art

So first 'proper' blog post, obviously had to be nail art. (An obvious choice for me, anyhow)

Some people can't leave the house without a full face of makeup, but for me, I can't leave without a full set of nail art. I've also managed to build a bit of a reputation with my friends for having crazy nails, anything from Angry Birds to floral patterns, so it's kind of expected now....

It's also nice to get back into nail art, since I've just finished uni exams and haven't really had time. Thought I'd start with something simple, and just as easy to do with your non-dominant hand.


1. Start with a base coat, then apply two coats of a colour (I've gone for a lovely pastel blue)


2. Add splotches of a brighter colour, using the normal nail varnish brush


3. Carefully 'half-outline' the splotches and add dots/curves with a black striper or nail art pen

And of course, don't forget to protect it all with a top coat! I used a matte one but any will do.


Products I used from left to right: PDR Nail Hardener, Barry M Blue Moon, L'Oreal Colour Riche Opulent Pink, Models Own Nail Art Pen Black, Essie Matte About You

xxx